How to Upload Photos on Instagram From Laptop or Desktop PC via Google Chrome
Do you have photos saved in your laptop or desktop PC that you want to upload to Instagram but you realize it won't be that easy or convenient to do as the web version of IG only lets you view profiles and images and not upload files?

Some would advice you to just transfer the images to your Apple iPhone or Android smartphone first and upload them through the IG mobile application -- and that's a good tip.
However, I recently discovered a way to upload photos to Instagram straight from your notebook or PC using the familiar Google Chrome web browser -- and the coolest part is that it's actually very easy to do.
Let me show you how.
First you just need to go to Instagram.com using Google Chrome and to log-in to your account.
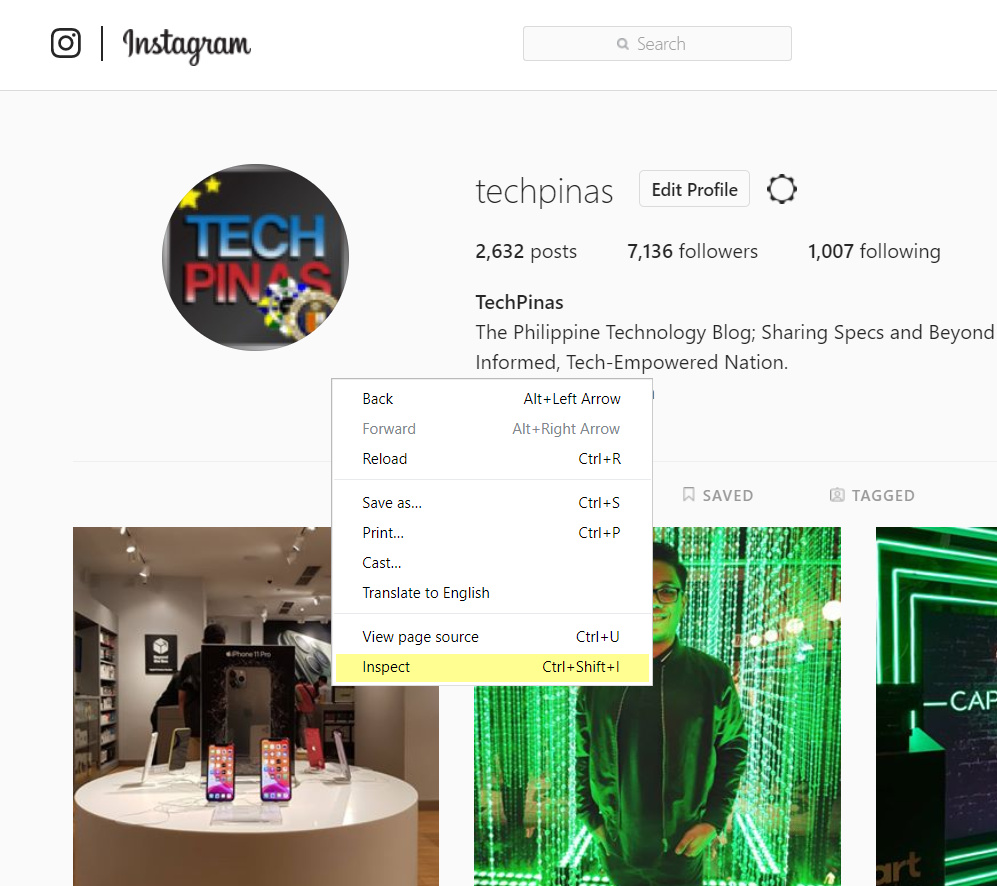
After signing in, go to your Profile and right click on any white or blank part of the page. Then click on the "Inspect" option.
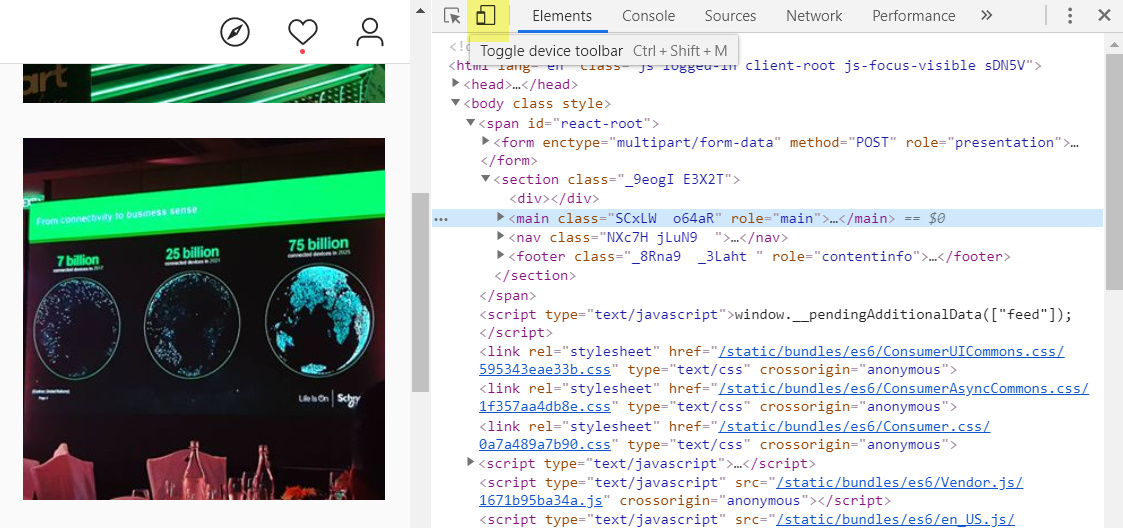
The Inspect Screen shows you different elements of the page from its html construction to the cookies used -- but the best thing about it is that it lets you view the mobile version of the page or website. You can do that by clicking on the "Toggle Device" icon as shown in the yellow box above.
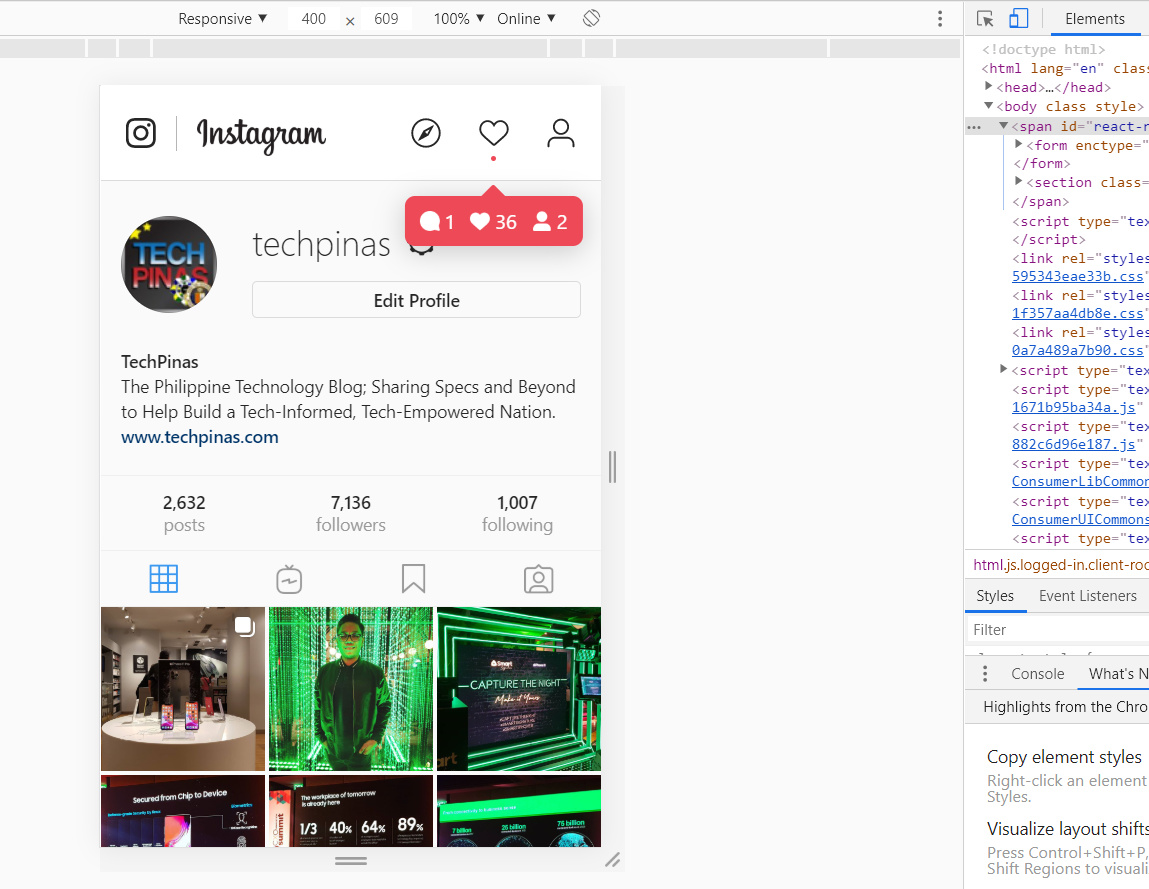
The mobile version looks almost exactly like Instagram's current mobile application for iOS and Android. However, when you first load it via "Toggle Device" option, you won't get the upload button. You'd have to refresh the page to get it; This is very important.
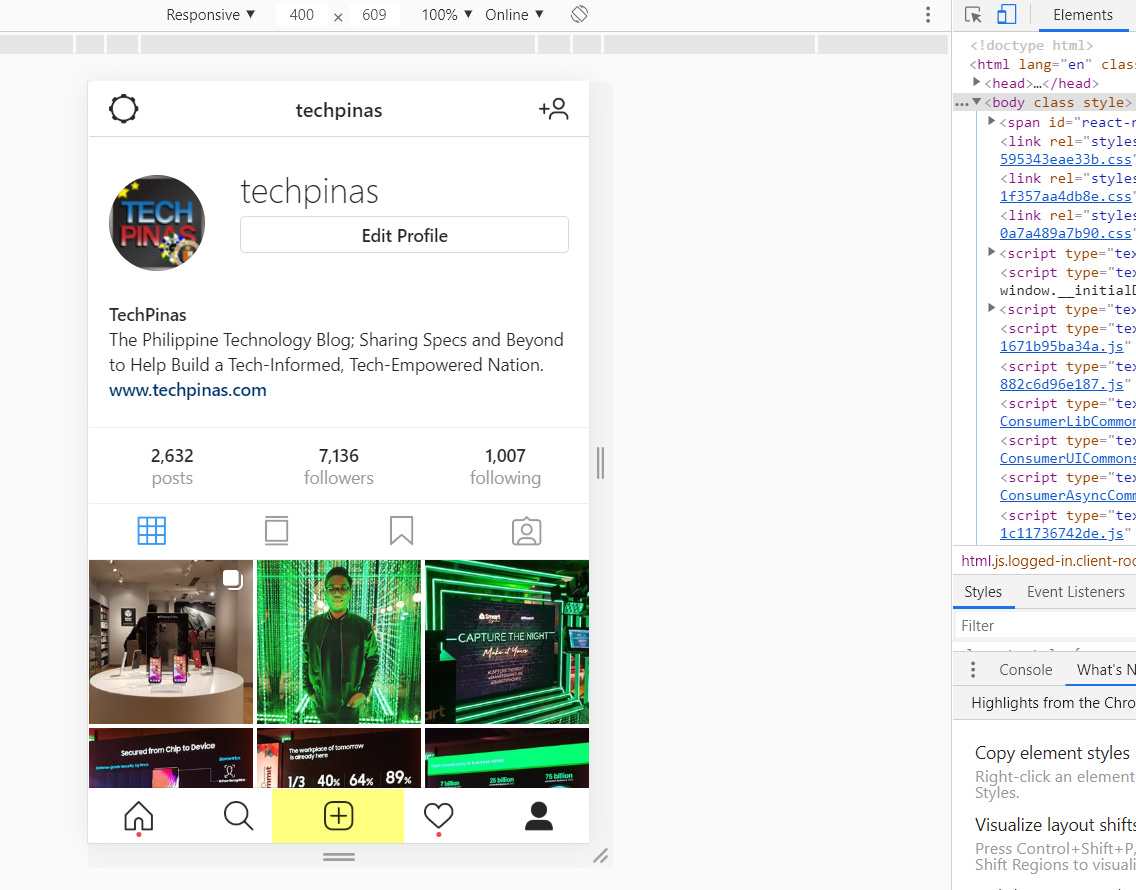
After refreshing the page, the upload button should appear along with the icons for Home, Search, and Notifications at the bottom part of the screen.
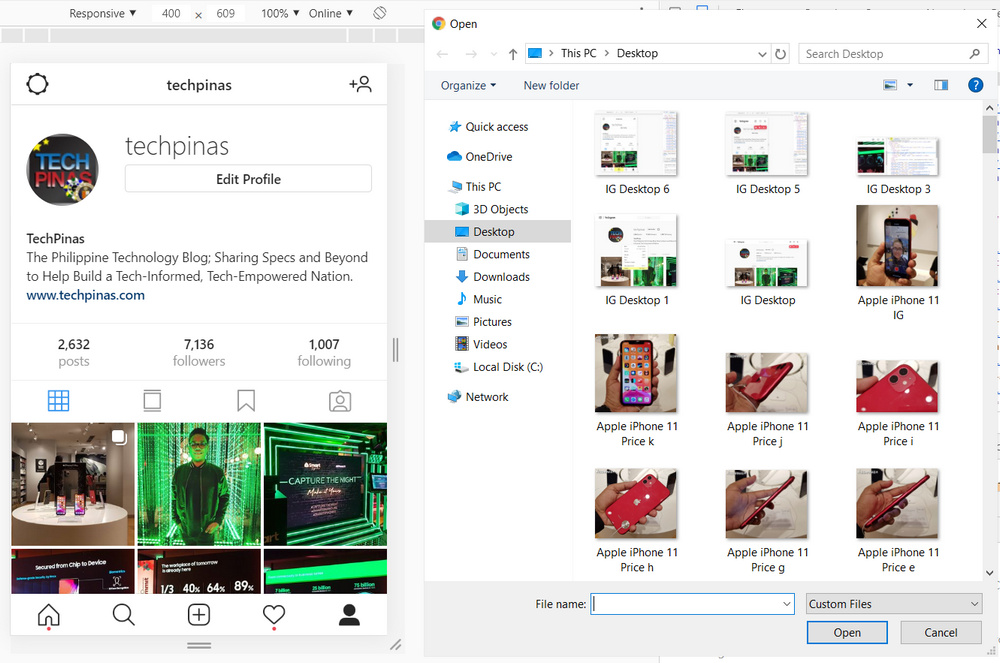
Just click on the upload button and choose the image that's saved in your laptop or desktop that you want to upload to Instagram.
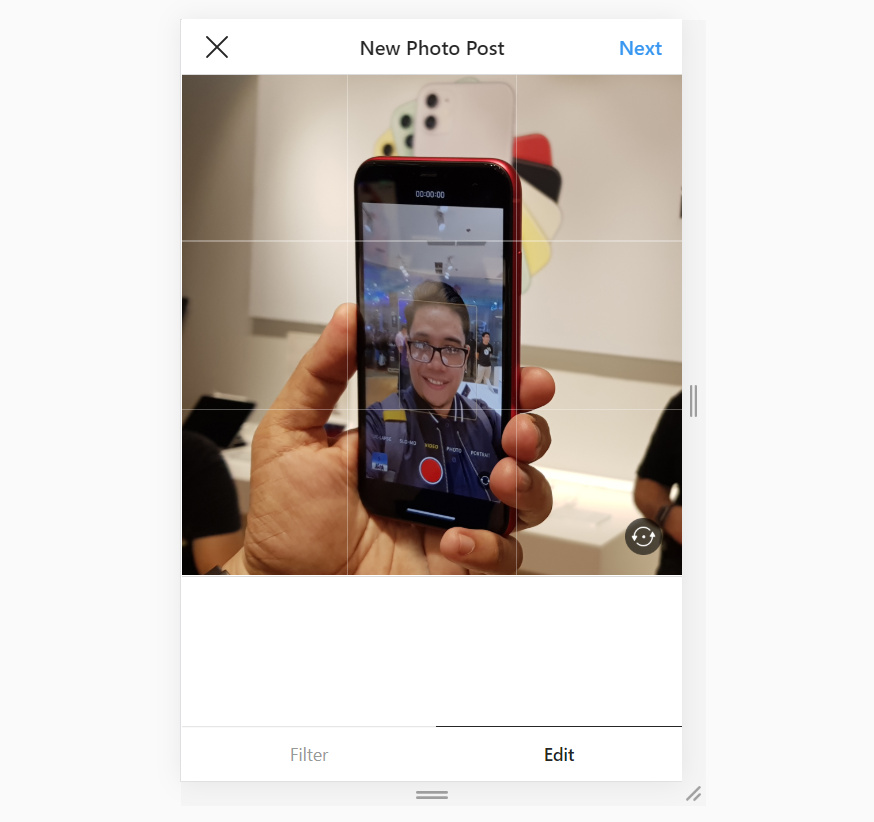
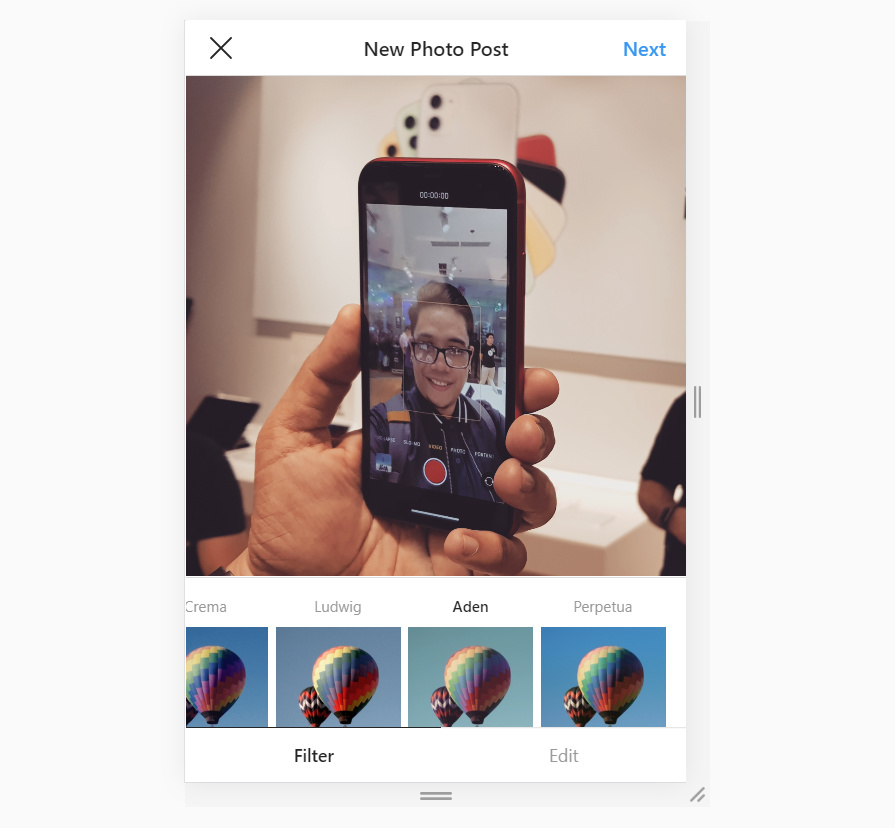
Like the smartphone application, the mobile version on Google Chrome web browser lets you apply filters to your shot to make it look more interesting or visually appealing. You may also reposition or rotate the image under the Edit section. Sadly, there's no option to zoom in or out yet nor to change the leveling if your shot is skewed -- so you might want to first edit the image to your liking through Adobe Photoshop or similar desktop software.
If you wish so, you may add a caption along with hashtags before uploading your photo.
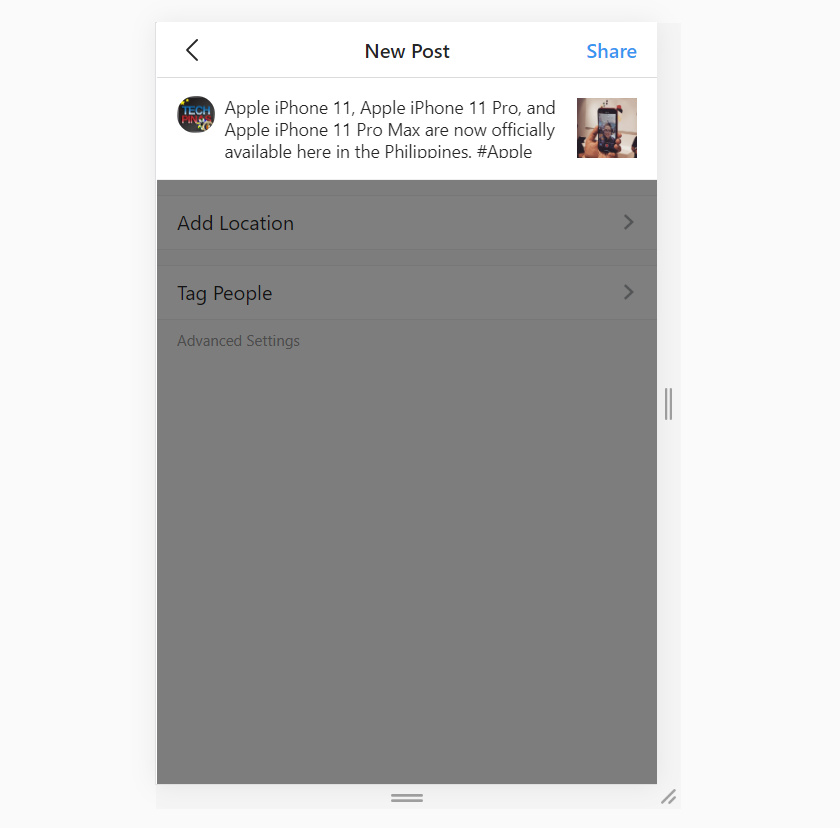
Once you're done, simply click "Share" to upload your image to Instagram.

Your IG followers will then be able to see it on their smartphone application where they can like it or leave a comment.
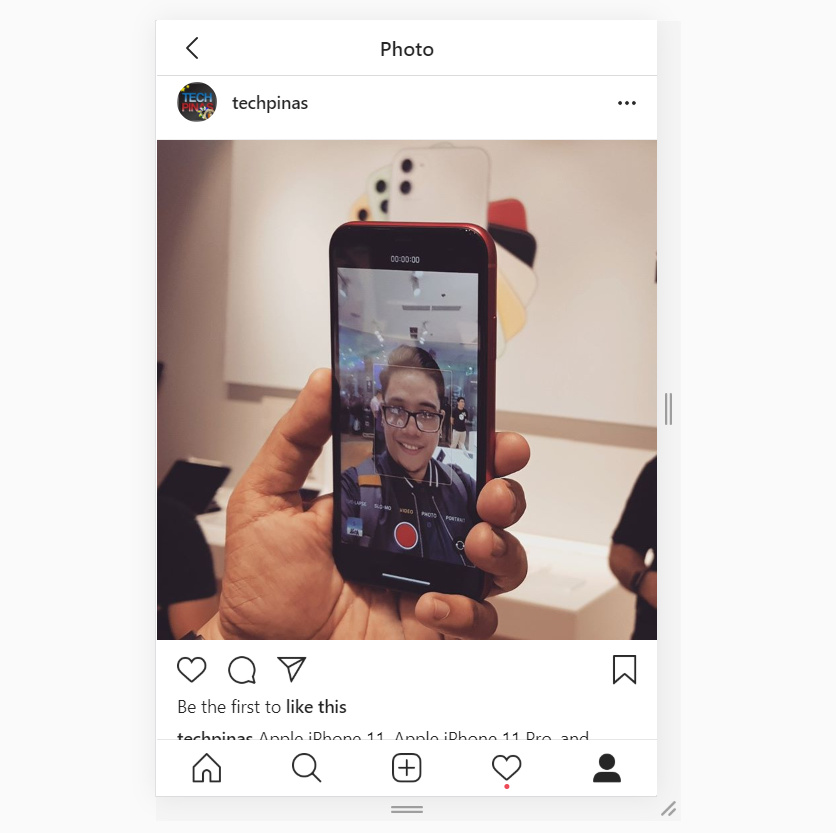
Surprisingly easy, right? If you found this TechPinas tutorial useful, don't forget to share it with your friends on social media. I hope they find this content valuable too. Cheers!

Some would advice you to just transfer the images to your Apple iPhone or Android smartphone first and upload them through the IG mobile application -- and that's a good tip.
However, I recently discovered a way to upload photos to Instagram straight from your notebook or PC using the familiar Google Chrome web browser -- and the coolest part is that it's actually very easy to do.
Let me show you how.

First you just need to go to Instagram.com using Google Chrome and to log-in to your account.
After signing in, go to your Profile and right click on any white or blank part of the page. Then click on the "Inspect" option.

The Inspect Screen shows you different elements of the page from its html construction to the cookies used -- but the best thing about it is that it lets you view the mobile version of the page or website. You can do that by clicking on the "Toggle Device" icon as shown in the yellow box above.

The mobile version looks almost exactly like Instagram's current mobile application for iOS and Android. However, when you first load it via "Toggle Device" option, you won't get the upload button. You'd have to refresh the page to get it; This is very important.

After refreshing the page, the upload button should appear along with the icons for Home, Search, and Notifications at the bottom part of the screen.

Just click on the upload button and choose the image that's saved in your laptop or desktop that you want to upload to Instagram.

Like the smartphone application, the mobile version on Google Chrome web browser lets you apply filters to your shot to make it look more interesting or visually appealing. You may also reposition or rotate the image under the Edit section. Sadly, there's no option to zoom in or out yet nor to change the leveling if your shot is skewed -- so you might want to first edit the image to your liking through Adobe Photoshop or similar desktop software.

If you wish so, you may add a caption along with hashtags before uploading your photo.

Once you're done, simply click "Share" to upload your image to Instagram.

Your IG followers will then be able to see it on their smartphone application where they can like it or leave a comment.

Surprisingly easy, right? If you found this TechPinas tutorial useful, don't forget to share it with your friends on social media. I hope they find this content valuable too. Cheers!

